Hitting Basics
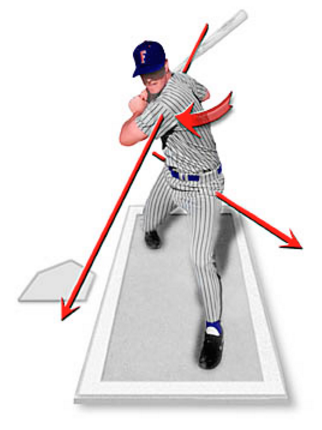
Hitting is the hardest thing to do in baseball! Great hitter’s fail 7 out of 10 times. Hitting is even harder to coach and help players. We wanted to create a Coaching Academy page solely on hitting basics so that we can establish common language and concepts regarding hitting basics.
The great thing for you is that Steve Nicollerat has been immersed in hitting for about 15 years in private instruction, hitting clinics, and presenting at organizations throughout the U.S., and is only 1 of 6 Nationally Certified Epstein Master Hitting Instructors. Through his experiences both as a nationally certified hitting instructor and as a teacher, he created this guide to hitting basics he uses to teach across the country.
3 Principles of Hitting
This video explains the 3 principles of hitting in action.
The first principle in hitting basics are understanding the 3 principles of hitting. Every coach and parent needs to know and expect these principles out of their players and kids regardless of age or skill level. The 3 principles of hitting are:
- Plane the Pitch
- Hips Lead the Hands
- Hands stay Inside the Ball
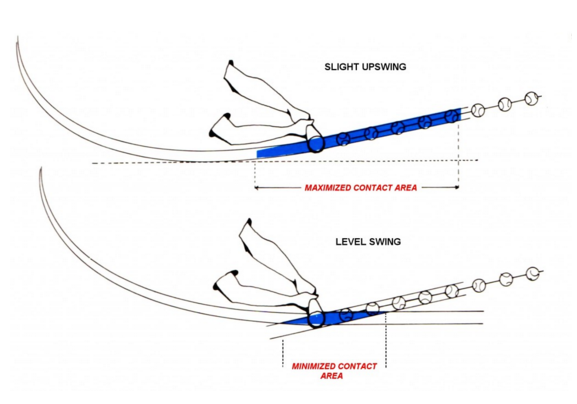
1. Plane the Pitch
In the perfect swing, a hitter should be swinging slightly upwards. This is called “planing the pitch.”
The hitter wants to keep their bat in the same plane as the ball for the longest possible time. By doing so, the hitter has a greater chance of making contact.
2. Hips Lead the Hands (Creating Torque)
In these pictures to the side, the swing, in a single frame, reveals that the hips pop (not by squishing the bug) from the front side. As the hips pop and begin to rotate toward the pitcher, the upper body moves very little. Separation occurs between the top half and the bottom half of the body.
This separation is called torque and is the source of power in a baseball swing.
3. Hands Stay Inside the Ball
Keeping the hands inside the ball means that the elbow gets to a spot near the ribs as the hitter gets into the approach or short 3 position.
At this point, as the hands begin to move they move in a circular path rotating with the upper body.
Many youth hitters throw their hands out to the ball, but this causes their hands to work against the upper body and not with it.
When done correctly, the hitter who keeps his hands inside the ball will be able to keep more balls fair, and he will have a short compact swing.
In the video below the hitter’s hands move in a circular fashion even though the pitch is on the outside part of the plate.
The hands follow the upper body as the upper body rotates around its axis.
Linear vs. Rotational Hitters
There are two kinds of hitting styles: linear hitting and rotational hitting
Linear Hitting
A linear hitter is a hitter who transfers their weight/balance from back to front. The front leg does not lock and the energy flow is toward the pitcher.
Linear hitting can result in great hall of fame caliber players. Ichiro, for example, is a linear hitter. There is absolutely nothing wrong with the way Ichiro hits. In fact, linear hitting is a great way to produce a lot of singles and a high batting average. Most lead off hitters, as well as your 7, 8, 9 hitters will be linear hitters.
Linear hitting is great for players that can run like the wind, but for the rest of us, and for your heart of the order players, you may need to think about teaching rotational mechanics that generate long gap shots and extra base hits.
The biggest concern in teaching linear mechanics to young players is what happens when these players grow up and do not have the characteristics of a linear hitter (great speed, lots of good contact). There are not many places in baseball for a slow right handed hitter who hits balls on the ground.
But a young hitter who is taught rotational mechanics can easily be used as a lead off type of hitter by just putting the hitter more on his axis rather than behind his axis.
Rotational Hitting
Now let’s take a look at some of the key rotational hitting mechanics of the most powerful swings in baseball over the years. Notice how these guys use rotational hitting mechanics. It’s important to talk about these three terms when teaching rotational hitting:
- Torque
- Long Three or Contact
- The Finish
Torque
Torque generates the power behind hitter’s swings as the “hips lead the hands.”
- Hitter’s bottom half is going to pitcher
- Hitter’s top half of the body stays back
- Back foot does not squish the bug–when back foot does rotate around it rotates as a result of other actions–not the cause and therefore should not be taught. On high pitches the back foot will actually come off the ground!
- This is known as torque
- Torque is responsible for rotation of upper body which happens just after these frames
- Torque is a very important component of a powerful swing
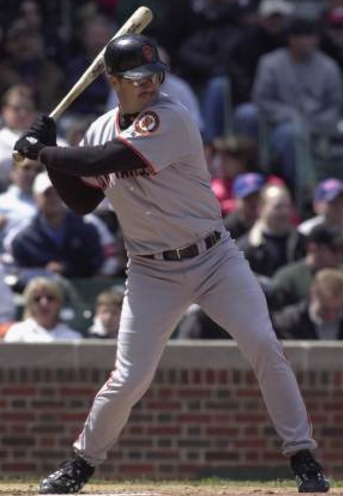
Long Three or Contact
Long Three or Contact in a perfect swing has these characteristics:
- Back elbow in
- Shoulders dipped
- Bat head below hands
- Back knee hinged
- Front leg locked
- Front elbow up
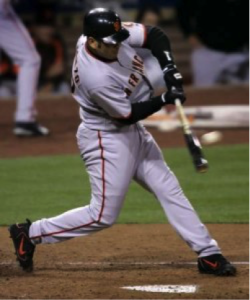
The Finish
When a hitter finishes their swing, there are several key features to look for:
- Back knee hinged
- Front leg locked
- Front foot may flop
- Hitter still behind axis
- Lower pitch higher finish

Hitting Analysis
In this video, Steve Nicollerat analyzes a swing with the current technology. Steve has spent about 15 years studying and analyzing thousands of swings. He has become only one of six Epstein Nationally Certified Master Hitting Instructors. He provides the pinnacle of hitting instruction to clients from around the country.
Hitting Drills
We use the following Hitting Baseball Drills at each of our team’s practices throughout the season, as well as our youth baseball camps. Our players also use these drills in their off-season workouts.
1 Hitting Basic Terms (Approach, Contact, and Power V)
2 Batting Grip
3 Hitter’s Head
4 The Batting Stride
5 Load and Advanced Stride
6 Trombone Drill
7 Trombone to Contact Technique
8 Trombone to Contact (Dropping the Bathead)
9 Power V
10 Proper Power V Explanation and How to Avoid Rolling Over
11 Elbow Queue and Bat Drag Explanation
12 Punch Drill
13 Ball Drill (Avoid Bat Drag)
14 Elbow Target Drill
15 Elbow Queue Drill
16 Top Hand Isolation (RH Hitter)
17 Bottom Hand Isolation Drill (RH Hitter)
18 Bottom Hand Isolation Drill (with Ball)
19 Chair #2 (Turn, Slot, and Finish)
20 Chair #2 (with Ball)
21 No Legs (with Impact Bag)
22 No Legs (with Tee)
23 No Legs (with Ball)
24 Hinge Drill (Explanation)
25 Hinge (from side view)
26 Hinge and Rotate
27 Hinge, Rotate, and Lift
28 Hinge, Rotate, and Lift (with Impact Bag)
29 Hinge, Rotate, and Lift (High/Low with Impact Bag)
30 Torque Drill
31 Stride and Early 2 Drill
32 Wall Drill
33 Wall Drill Continuation (no wall)
34 Stride, Early 2, Full 2
35 Hitting Approach
36 Approach to Power V
37 Full Swing
38 Swing to Contact (Impact Bag)
39 Swing to Contact (with Ball)
How do we use Hitting Drills in baseball practice?
A lot of coaches have asked us online or at our clinics, what do these drills look like in practice? How are they structured and setup? How do you execute these drills? So on and so forth.
The videos below should give a general idea of how our drills look like at baseball practice.
